October 31, 2013

Vintage Inspired Halloween Folk Art


Although I can't afford the real thing, I am drawn to the charm
of vintage Halloween folk art pieces.  Over the past couple of 
years I have collected a few reproduction vintage
Halloween items and even attempted a DIY vintage pumpkin.
This year the little collection found itself in the kitchen.

Most of the items came from Hobby Lobby when their 
Halloween items were on sale.  The two largest pumpkins
were purchased from a floral wholesaler's tent sale. 
The suprized pumpkin was made for about $3 mostly
 from items from the Dollar Tree.  

The $3 pumpkin got her start almost accidentally.
The large paper mache' pumpkin with the striped
 hat was a good buy at $11.25...


...but he had condition issues like broken surface areas,
 weird painting around the bottom and the top of his
head doesn't fit onto the bottom very well. 

I "googled" around to try to find a way to fix the 
broken areas and came across "paper clay".
Most of  the "recipes"  called for toilet paper, water,
glue, joint compound and linseed oil.  They made much
more quantity than I needed for a patch job. I decided to
just use the first three ingredients (which I already had)
to try to fix the broken areas.  

(I could have tried traditional paper strips mache' but it looked like that would have 
taken more time to make it blend into the original pumpkin surface.)

At first I mixed the toilet paper (about 10 sheets at a time)
with enough water to throughly wet the paper and
then added a few squirts of school glue in a bowl and
mushed them all together.  

I just pinched off pieces of the mush and patted the
"spit balls" into/onto the broken areas.  After drying 
overnight, the patched areas were very firm and
the texture was similar to the surrounding areas. 
It also took acrylic paint well. 

That experiment made me wonder if the same mix
would work on hiding the obvious seam that is on
Dollar Tree carvable pumpkins.

Well, yes, it did hide it but then the "fix" was a different
texture than the original surface.  However, the toilet 
paper mache' gave the middle of the pumpkin a 
similar texture to the reproduction vintage Halloween 
items from Hobby Lobby. I figured the HL designers
 had researched and made their items close to real
vintage items so I would just copy HL.

As I went along, I decided it was easier to just soak a
few pieces of toilet paper in some water, pinch off
pieces of the wet paper, press it onto the pumpkin 
 put a little glue on top of the "spit ball" and rub it in.


It is very easy to do BUT I found that with either method
the glue makes your fingers so sticky that you have to 
apply a "spit ball" then move over to another 
area and do the same so you are not accidentally 
pulling up non-dried areas with your sticky fingers.  

So the little pumpkin actually took about 3 sessions of
applying, then letting the toilet paper, water, glue mix
 dry and starting again. Each session was quick.
  It is easy to stop and start...just rinse out
 the bowl and wash your fingers off between 
sessions.   Eventually all the little sections of the
dried mix bump up against each other.

I tried to put larger pieces of the soaked toilet paper on
the pumpkin (on the bottom so it wouldn't show)
 to make the process faster but the texture was 
different and not like the real vintage pieces.

When the surface has been covered with the toilet paper
mache' and has dried, it is ready to paint.

OK, so I said that you could make the vintage pumpkin
for about $3 with items from Dollar Tree:
pumpkin $1
school glue $1
water color set $1

Actually I did not use a water color set to paint the pumpkin
but an inexpensive acrylic paint from the craft store.
Also I used a sharpie pen and not black paint from a 
water color set but you COULD use the set and get the
same results...truth in crafting costs. 
Oh, I didn't count the cost of the toilet paper...I HOPE
that you have some of that on hand already.

This is the pumpkin after the first coat of paint:

For the second coat I used a slightly different orange to
give it a little variation but you would not have to do that.
If you are using a water color set, you could mix a little
more red or yellow into the orange to make it different.

For the face of the pumpkin, I "googled" and found
a vintage item that looked easy to copy.  You might
find a vintage pumpkin face that you like better.

I was afraid that the paint might "run" or "bleed" on the
toilet paper surface so I experimented on the bottom.
The paint did not run or bleed.  Maybe the glue seals it.

Here is our girl all finished...

...Tom Kat thinks that she looks like Betty Boop.
To give her a little more aged look, she had a little 
 brown acrylic paint mixed with satin varnish
 brushed on top of the dry paint.

(This same toilet paper mache' technique could be used
on larger faux pumpkins too to make larger  vintage-inspired 
Halloween decorations.  I'm planning on getting a larger faux
pumpkin when they go on sale after Halloween and try a
big one next year. )

Here she is with her new friends:

The large white pumpkin got an orange ruffle to help
him blend in color-wise a little better with the other items.

 In looking at vintage Halloween items online, I 
noticed that a lot of them have ruffles at the neck.
All of the orange crepe paper was sold out so the
pumpkin got a ruffle made from 3" strips of paper napkins.

It was easier to tape the ruffle to the cake stand 
than to try to attach it to him. 

I had forgotten that I had bought the medium sized 
vintage-looking cat and pumpkin heads last year at a big
discount at the after Halloween sale  at Hobby Lobby. 

When HL put their Halloween items on sale back in
 September of this year, I guess I still liked them and bought
 them again (forgetting about the ones sitting in the attic).
As I was getting Halloween items out of starage,
 I found the ones purchased last year too.

This year's are exactly like last year's but even cheaper.

If you look closely you can see the repaired and repainted
areas on the large orange pumpkin.

For right now, good enough is good enough.
His head still does not fit together very well.

These guys are just like they are when they came from HL.
The black riser the cat head is sitting on is just some wooden
plaques from the craft store painted black and stacked.

Since I had duplicates of the SAME items I decided
to split the vintage items up between the kitchen table
 and the counter...maybe no one will notice the twins.


The frills on their hats could use a little sprucing up but
if these items really were vintage, the hats would probably
look like that anyway.

The black candlesticks are ones that were purchased in 
the clearance section of Hobby Lobby and all painted
 black to unify them.  They were used in a similar vignette
a couple of years ago in "Pick A Peck of Pumpkins".

All of those faux pumpkins on the candlesticks got a new 
paint job this year after being bleached by the sun in the
yard for a few Halloweens.  They also got new stems.
If you want to see how I made the stems you can click 

Another vintage vignette by the refrigerator is tiny.

It got started when I got a set of little reproduction vintage
 cards with tiny clothespins on the back from World Market.  
I haven't really figured out a good use for them but
for now they are clipped onto votive candle holders.


On this card, the little girl is warming her buns by the fire...
...I hope her buns don't CATCH fire on the candle.
I don't have them lit unless I am in the room.

This little guy came from Dollar Tree.

To me he looks like some of the vintage items that have
the body of a human but the head of a pumpkin.
I enhanced his colors a little bit with acrylic paint.

Thanks for taking a Halloween tour of my kitchen décor!

October 29, 2013

Make Fake Vines and Stems


Wanting some more vines for another pumpkin patch
(this time between two metal black cats at the front porch)
but NOT wanting to make another foray into the woods
for more vines, I tried to make fake vines and stems. 

This project would be good also for folks who don't 
have access to areas to collect vines or don't want to 
have encounters with large spiders and their webs or
get multiple chigger bites (like I did getting vines for


Finding real pumpkin stems to replace lost or crummy
stems on faux pumpkins has not been easy for me.
Stem replacements made from old vines or sticks are
OK but not that real-looking.

A couple of years ago I made starfish shapes out of 
canned insulation foam and decided to see if the foam
would be able to make vines and stems too.

For the experiment, I got two different kinds of foam from
Walmart.  They were about $3.50 each.

Here is about the amount of vines/stems you can 
expect from one can...

...and two cans:

Here is the texture difference between the two 
cans if you were wondering or have a preference.

Keep in mind that the canned insulation foam expands
a lot after it is sprayed out.  

It will stick to anything that it touches when it first comes 
 out.  Follow all the safety directions on the can. Keep any
 children or animals away from the foam until it is dry. 

 I have used waxed paper for spraying the foam out in the
 past since it is clear and it WILL be stuck to the back of
 your foam shapes but I was feeling cheap this day and just
used newspaper since I was going to be painting the foam. 

Be prepared to spray the whole can once you start.
It hardens in the application spout/tube quickly so 
you really can't stop and start or save it for later use.

All of the crazy items on the newspaper are to hold it
down since a gust of wind blew up the paper right 
after I sprayed out the foam...almost a disaster. 
Those shapes in the bottom left of the above photo are SUPPOSED to be pumpkins stems
 but they look  like they belong to Peter Peter Pumpkin Eater.

The foam just kind of does what it wants to so 
don't expect too much control over the results.

Here is some foam vines that were left overnight on
the newspaper...trying to curl up.

This is tricky (and I'm SURE not recommended so don't
attempt if you have concerns) but when the top of the
foam is feeling firm (about 30 minutes after getting out
of the can) if you pull the shape off of the paper, it
will have a slightly more rounded shape on the back
when it dries completely. 

The foam shapes can be cut with a serrated knife.
The cut surfaces will be rough and bubbly-looking
and are harder to paint so try to cut as little as possible.

Here is an attempt at a spraying out a pumpkin stem
 and vine together...

What looks like a claw was supposed to be those
pointed areas where the stem and pumpkin
attach but that was a "fail".

To be able to attach the above foam stem/vine to a 
faux pumpkin, it would need to be flatter so the
claw part was just cut off after the foam had dried.

Use an old knife that you will throw away or only use
for crafts after cutting the foam with it. 

The foam can be painted with acrylic paints.  It takes
a little longer to dry on the foam (maybe due to the 
slick surface?)
To get the paint to stick to any cut surfaces, it is better
to add some plaster of paris (from the craft stores) to the
paint with enough water to make it brushable. 

You can get pretty good coverage with one coat of
acrylic paint.  For a little more realism, I used about
three different greens/browns coats watered down...
you don't have to do that for still a good look.

I should mention that this project took more time 
than I had anticipated but it was enjoyable seeing
the results. Tom Kat would beg to differ that it 
was worth the time spent. 

Some of the vines were so long that I just painted 
them in the grass in the backyard so I didn't have
to "carpet" the house with newspaper to catch drips.

Some of you may only want pumpkin stems for your
faux pumpkins and not the vines. Here is how the foam ones

They kind of look like pickles.  

The acrylic paint only looked too flat so I tried different
finishes to add a little sheen.  It is hard to see in the photo
but the Krylon satin clear spray turned out the shiniest.
I kind of liked the others better.
To add some sheen to the vines, the sprays were much 
easier and faster...either matte or satin looked fine on them.

To attach the painted vines/stems to the faux pumpkins
I used Gorilla glue because it does not "melt" foam. 
There are probably other glues that would work also.

This picture shows a fake pumpkin stem I made a couple
 of years ago from polymer clay...it was time-consuming too.

An important thing to know about Gorilla glue is that it
(like the canned insulation foam) expands as it dries.

This had an unexpected benefit in that if enough Gorilla
glue was used in attaching the stems, it made a more
realistic connection between the flat bottom of
 the foam stem and the faux pumpkin.

The blue painter's tape is to hold the stem in place
as the glue dries.  

The Gorilla glue can be as dangerous as the canned
foam if you get it on you before it is dry.  I used a 
wooden skewer to pull some of the glue up on the 
stems as it expanded as it dried.  

Some of the glue was also added to the upper stem as an
enhancement to try to mimick a real pumpkin stem. 

The dried glue seemed to take acrylic paint just fine. 


The stem-only pumpkins are part of a vintage Halloween
vignette on the kitchen table.
If you would like to see more of the vintage Halloween
items in the kitchen (and how to make your own) click on
"Vintage Inspired Halloween Folk Art".


Adding the expanding glue to the stems may be going into  
 "Crazy Lady" territory. The stems also also looked just fine
 with just enough glue to hold them to the faux pumpkins.

Attaching the stem/vine combo to the pumpkin is a
little trickier since the weight of the stem needs to
be supported as the glue dries. 


Here is the above pictured pumpkin "in action" as
it tries to hide the pot of plants masquerading as
pumpkin leaves.

The garden center ran out of sweet potato vines so
bean plants were put in orange painted pots that were placed
near pumpkin stem/vine junctions.

I was hoping that the pots being painted orange would make
them look more like pumpkins but it didn't help much. 

Only trick or treaters coming to the door will see 
the pots very well.  Should I move the vines for Halloween
night or just hope the kids can step over them? 

You don't have to use real plants for your patch.
The large orange pumpkin and the multi-color one in
the photo below rely mainly on artificial leaves
to cover the vine/stem connection.

The thicker the vine, the less likely it is that it will break
but it is also less bend-y.  Plan on the larger vines running
on top of or beside the pumpkins and mimick a connection.

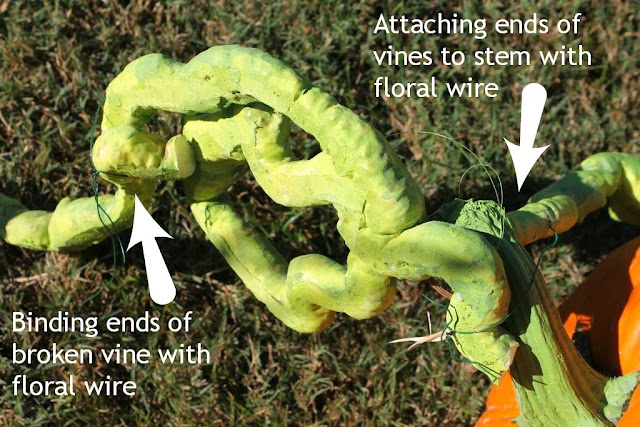
At first I tried connecting the vines and pumpkin stems
with fishing line because it is practically invisible.


On one connection point the fishing line failed and the
vine also broke.  Both problems were fixed with floral wire.

At each connection point, the pumpkin stems were painted
to match the vines.

Here is a small patch that utilizes a thin and thick vine:

It is probably the most visible "patch" as folks turn down
our street and see our house. 

The vines were painted a bright green to match the color of
the sweet potato vines scattered around the yard and
 in the urns.  The orange and green colors really "pop". 

The vines at the porch are not very realistic up close
but they are almost whimsical and are easy to see 
from the street (where most folks will see them from).

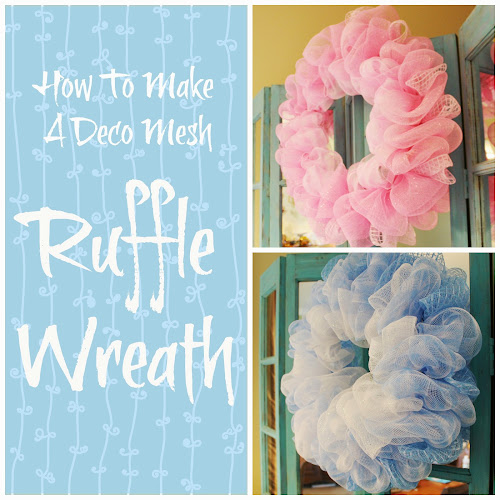
If you would like to see how to make the Halloween
spider web wreath on the front door, see
 " How to Make a Ruffle Wreath".


The back porch also has a couple of foam vines/stems.
This large white faux pumpkin had lost its stem.

It got a new foam stem/vine combo replacement.

It was attached with Gorilla glue initially and then as
the first layer of glue dried, more glue was added
to build up the look of the connection.

After the expanded glue dried, it was painted.

The long stem arches back into the planter to
give the look that the pumpkin is growing 
out of the planter.

Twelve years ago before large white faux pumpkins
were available in stores, I attempted to make one out of 
the canned insulation foam. For a base for the foam,
I taped together two large purple plastic bowls.

The foam had to be applied in sections at a time to allow
for one side of the foam to expand and dry before proceeding.

It has not been out of the attic for at least nine years.
The paint is almost completely gone.  Since this is my year 
to repaint/rehab old faux pumpkins, I brought it down.

"Goose Bump" pumpkins are popular now so I tried 
to make the gnarly pumpkin resemble one of those.

The insulation foam pumpkin got a new foam stem too.

It is happy to be out of the attic and on the back porch.

As usual, I only have my decorations out in the nick-of-time.
I don't like being a last-minute person but I am. 
If you like the foam vine/stem idea, you can "pin it" for 
next Halloween or use the concept during the year if you
need props for other holidays, school/church plays, or
bachelorette parties. 

© Miss Kopy Kat. Design by FCD.